
How to Optimize Images for WordPress in 2026 (Without Losing Quality)
I used to upload images to WordPress without thinking much about optimization.
If a photo looked good, I uploaded it directly.
That was it.
Then one day I checked my website speed score and realized something shocking — images were slowing down almost the entire website.
Some pages were taking forever to load on mobile devices.
Visitors probably left before even reading the articles.
At first, I thought fixing image optimization would require advanced editing skills or expensive software.
Honestly, it turned out much easier than I expected.
Once I learned a few simple techniques, my website became noticeably faster without making images look blurry or low quality.
If you are running a WordPress website in 2026, image optimization is something you should absolutely take seriously.
Good images improve blog appearance, but poorly optimized images can destroy website speed.
This guide will help you optimize images for WordPress properly without losing quality.
Why Image Optimization Matters for WordPress
Most beginner websites become slow because of large unoptimized images.
I personally made this mistake many times.
Modern smartphones create huge photo files. Even screenshots and Canva graphics can become surprisingly heavy if you upload them directly.
Large images can affect:
- Website speed
- SEO rankings
- User experience
- Mobile performance
- Bounce rate
Google also considers website speed as an important ranking factor.
Faster websites usually provide a better experience for visitors.
How to Optimize Images for WordPress Step by Step
After testing different methods, I realized image optimization mostly comes down to a few simple habits.
- Resize images properly
- Compress image files
- Use WebP format
- Write image alt text
- Enable lazy loading
- Use image optimization plugins
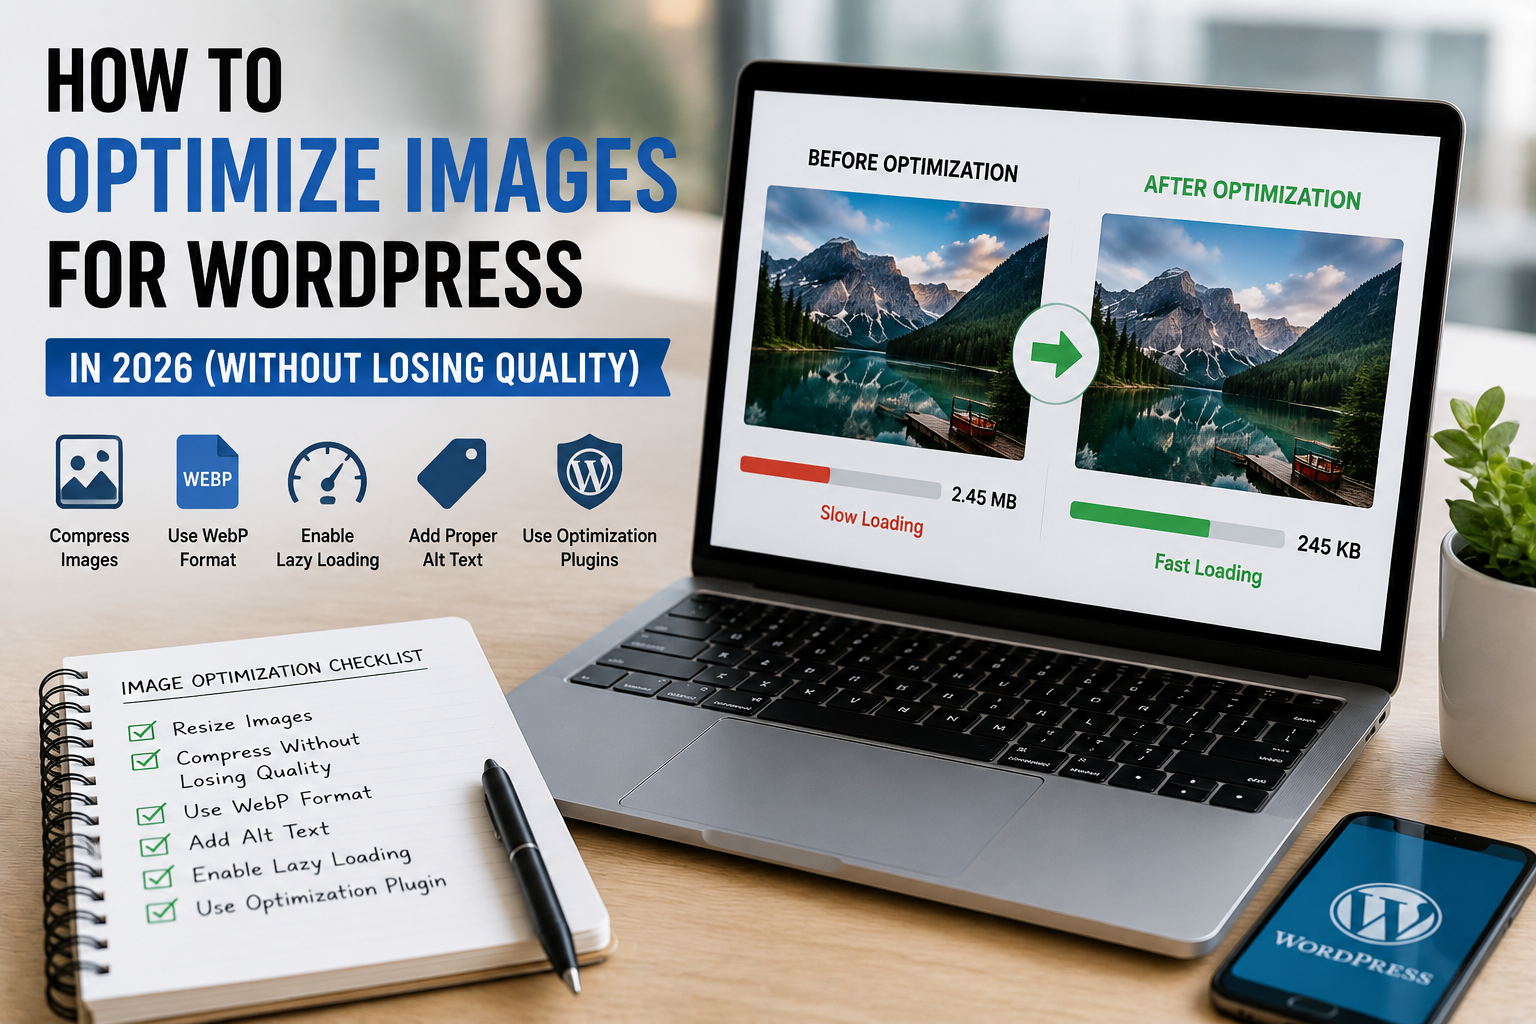
These improvements can dramatically reduce page size without noticeably reducing image quality.
Resize Images Before Uploading
This was one of the biggest mistakes I personally made.
I used to upload full-size images directly from my phone or laptop.
Sometimes those files were over 5 MB each.
That is far too large for normal blog posts.
Most blog images do not need massive dimensions.
Recommended Image Sizes
- Featured images: around 1200px wide
- Blog content images: 800–1200px wide
- Thumbnails: smaller compressed versions
I usually resize images using Canva because it is beginner friendly.
Compress Images Without Losing Quality
Image compression sounds technical, but it is actually simple now.
Compression reduces file size while keeping images visually sharp.
I personally noticed major speed improvements after compressing images properly.
Popular Image Compression Tools
- TinyPNG
- ShortPixel
- Imagify
- Smush
Even free versions work surprisingly well for beginner websites.
Use WebP Images
WebP has become one of the best image formats for websites.
I switched many websites to WebP format and immediately noticed smaller file sizes.
WebP images usually load faster while maintaining excellent quality.
Many optimization plugins now automatically convert images into WebP format.
Benefits of WebP Images
- Smaller file sizes
- Faster loading
- Better mobile performance
- Improved SEO potential
Write Proper Image Alt Text
Most beginners ignore alt text completely.
I did the same thing early on.
Alt text helps:
- Search engines understand images
- Accessibility improvements
- Image SEO
For example, instead of writing:
“IMG_2829.jpg”
Use something descriptive like:
“How to optimize images for WordPress”
Simple descriptive alt text works best.
Enable Lazy Loading
Lazy loading delays image loading until visitors scroll near them.
This improves initial page speed significantly.
Most modern WordPress versions already support lazy loading automatically.
Some caching plugins also improve this feature further.
Use a Good Caching Plugin
Image optimization works even better when combined with caching.
I personally use LiteSpeed Cache on several websites.
It helps with:
- Image optimization
- Page caching
- Lazy loading
- WebP support
Other good options include:
- WP Rocket
- W3 Total Cache
- WP Super Cache
Do Not Upload Random Screenshot Sizes
I used to upload screenshots directly without editing them.
Many screenshots were unnecessarily large.
Now I usually:
- Crop unnecessary areas
- Resize dimensions
- Compress files before uploading
Simple cleanup improves image efficiency a lot.
Choose JPEG, PNG, or WebP Properly
Different image formats work better for different situations.
JPEG
Good for normal photos and blog images.
PNG
Better for transparent graphics and logos.
WebP
Best balance between quality and performance for modern websites.
I personally use WebP whenever possible.
Optimize Featured Images Carefully
Featured images often become the largest image on blog pages.
Large featured images can slow down the homepage badly.
I usually:
- Resize before uploading
- Compress carefully
- Use clean readable designs
- Avoid unnecessary visual clutter
Simple thumbnails often look more professional than overly complicated designs.
Check Website Speed Regularly
One thing I learned is that speed problems slowly return over time if you stop monitoring them.
Whenever I publish new articles, I sometimes test pages using Google PageSpeed Insights.
This helps identify:
- Large image issues
- Mobile speed problems
- Performance bottlenecks
Common Image Optimization Mistakes Beginners Make
Uploading Original Camera Photos
Phone photos are often unnecessarily large for websites.
Always resize them first.
Ignoring Mobile Optimization
Images that look fine on desktop can slow mobile devices badly.
Using Too Many Heavy Graphics
I personally used to overload pages with graphics and animations.
Simple clean layouts usually perform better.
Skipping Alt Text
Alt text improves SEO and accessibility.
It only takes a few seconds to add properly.
Simple Image Optimization Setup I Personally Use
If I launch a new WordPress website today, my image workflow usually looks like this:
- Create images in Canva
- Resize images before export
- Compress using TinyPNG
- Convert to WebP when possible
- Add alt text properly
- Use LiteSpeed Cache for lazy loading
This setup keeps websites fast while maintaining clean image quality.
You can also read our Website Traffic guide because faster websites usually improve visitor engagement.
You can also explore our Common WordPress Mistakes article to avoid beginner optimization problems.
What Surprised Me Most About Image Optimization
Honestly, I expected image optimization to ruin image quality badly.
But modern optimization tools have improved a lot.
Most visitors cannot even notice the quality difference after proper compression.
Meanwhile, the website speed improvements can feel dramatic.
Final Thoughts
Learning how to optimize images for WordPress is one of the simplest ways to improve website performance in 2026.
You do not need expensive software or advanced technical skills.
Small improvements like resizing images, compressing files, using WebP, and enabling lazy loading can make websites feel much faster.
Good image optimization improves both SEO and user experience at the same time.
If you are serious about building a fast WordPress website, optimizing images properly is absolutely worth the effort.
Askwps is a technology and blogging website that shares helpful guides about WordPress, SEO, web hosting, blogging, website speed optimization, and online tools. Our goal is to provide simple and practical tutorials for beginners and website owners.